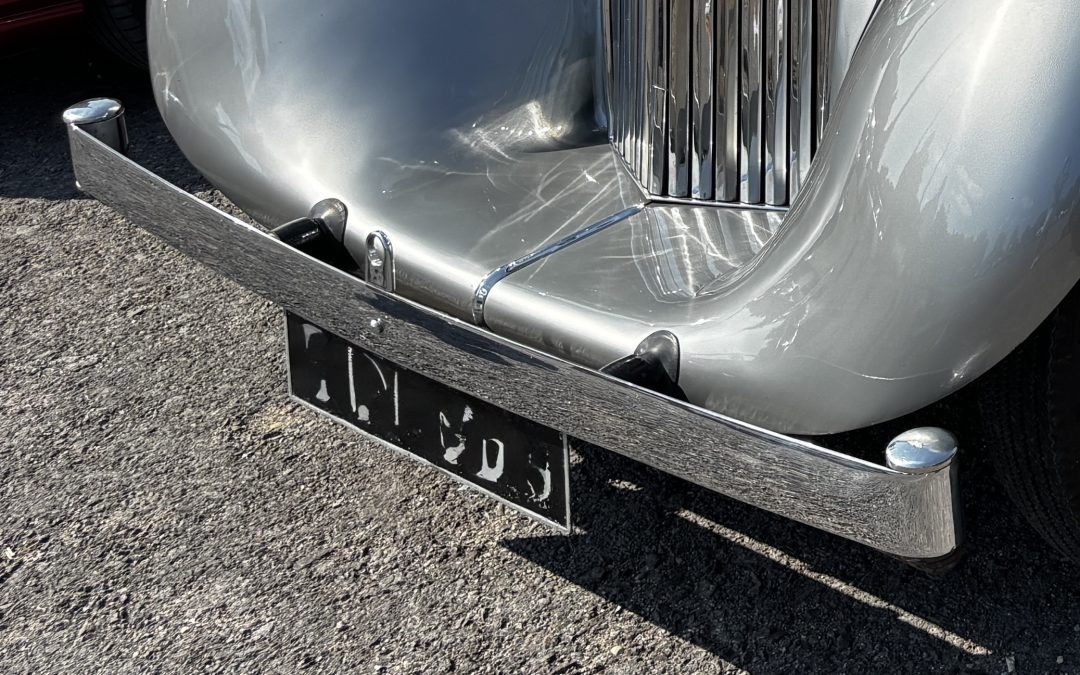
As you can see in the picture above, prewar bumpers are slim and elegant, on first sight they simply look like a flat piece of steel with a graceful loop on each end, finished off with a polished cap. In reality they are very substancial, behind them are 3 spring steel leaves rather like suspension leaf springs, and those nicely rounded ends - are full of lead.
The spring blades were designed to dampen vibration in the bumper blade but they also absorb impact during low-speed collisions. Their flexibility allowed the bumper to bend rather than break, providing a better safety feature for both the car and the occupants. The spring mechanism also (in theory) enabled the bumper to return to its original shape after being deformed, which added longevity to the bumper structure.
Filling the ends of bumpers with lead served to balance the weight of the bumper, providing more stability. This allowed for a smoother drive and improved the overall aesthetics of the car. All of this means that elegant looking thin bumper blade is flipping heavy!
You may recall I had mentioned the previous owner had an accident in the car many years ago (which wrote off the midwives vehicle) but the crash impact left a slight kink in the bumper blade which may or may not be 'repairable'. That is something for another day though. Today I wanted to dismantle the bumper to ascertain whether the bumper mounts (which will need to be re-chromed someday) are salvageable as they are severely rusty.

The bumper mount is essentially a length of bar about 150mm long that is screwed into the chassis. Onto that is slid a mentalistic bush which fits inside a brass housing with four bolts allowing a securing plate to clamp around the spring blades. Also fitted onto that mounting bar is a separate bracket for fitting the spot lights. Sadly all those components are rusted solid into one big lump. The bar itself, I can remanufacture - but I need to keep the bumper mounting bracket... therein lies todays fun - getting all of that apart so it can be restored and refitted another day.
Undoing the four nuts was not too difficult - I have an induction heater that when placed over the nut, rapidly heats it to red hot. If you then rapidly cool the nut, then reheat it again - more often than not the rust in the threads releases and the nut can simply be undone with a spanner. This saves a lot of anguish and the localized heat does not affect any other areas.

Above you can see the removed entire bumper mount. The top item is simply a rubber block pushed into a sleeve which apparently is there to further reduce vibrations but is easy to remove - below that is a nut that holds the whole mount together. As that nut is protected from the elements, it too was easy to remove. That is where 'easy' stopped. The rest of the mount is fused together with rust and despite soaking in rust remover for several weeks, nothing will budge.

Sadly I didn't photograph the mounting with out the top elements. But I needed to remove the perished metalsatic bush so that I could remove the bolts you can see in the picture above. breaking apart an ancient rubber bush is relatively easy using a power drill and eating through the rubber until basically all of it is removed. The main bar can now be removed leaving part of the bush in the mount and the inside part of the bush on the bar. Next step is to remove that bush outer sleeve from the mounting. A saw cut down the length of the sleeve is a tried and trusted method of releasing the grip slightly so the remains can be 'persuaded' to come out. Next the more challenging part....

Above you can see the inner mounting bar with the bracket that supports the spotlight. In theory the tube (which is the inner sleeve of the mentalistic bush) should slide off the bar... hmm... that will be a firm 'no way'. Several weeks more soaking with penetrating fluid achieved nothing. I couldn't put the whole thing in my lathe because the bracket would hit the lathe bed so I chose to try and gently cut the sleeve from right to left along with applying MUCH heat-cooling. Eventually I ended up loosening it.

And then wriggling the bracket free of the bar.

I cleaned the bar up on the lathe and it can now be reused. The spotlight bracket is very coroded (and is not available to purchase) so I may end remaking that...
Can I buy a replacement melastic bush? Not so far... but I have been investigating 3D printing of a rubber-like material that people use for vibration damping so perhaps... I can MAKE a replacement bush of the correct size.
When people ask ' why is the restoration going so slowly... I will point them to this blog entry 🙂