Progress is definitely happening—mostly in small but satisfying steps—and with every step I uncover yet another little surprise that’ll need attention later. For example, the bumper‑mounting shaft appears to have broken right through the casting that’s riveted to the chassis, so it no longer screws in as it should. I suspect this bit of drama occurred during the accident that saw the car taken off the road. The bumper itself has a slight kink too, and since it’s made from very thick spring steel, I’m not sure it can be persuaded back into shape without a fight.
The engine, meanwhile, remains thoroughly seized and is going to need some… persuasive encouragement. The central hinge on the bonnet has also called it quits at one end and will need replacing. One side of the rear bodywork has slumped by just over a centimetre. I’ll have to sort that before I even think about welding the sills in. There’s still loads of bodywork ahead, and both of the enormous headlights have earned themselves noticeable dents. But the real star of the show—the elephant in the garage - is that seized engine. Thankfully, I’ve tracked down an engine specialist who’s rebuilt over a hundred of these pre‑XK units… but first, I need to get mine unstuck!
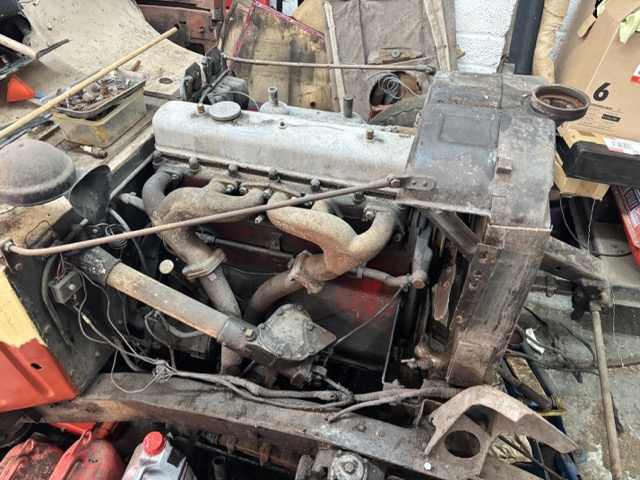
This engine is essentially the same as the one used in the SS100 sports car: a twin‑carb, 3.5‑litre overhead valve setup. One known weak spot is Jaguar’s brief experiment with lightweight alloy conrods. They turned out to be rather brittle, with a tendency to let go at high speed, which is not an experience I’d like to have. Luckily, I managed to find a set of steel conrods that will replace them. As a charming pre‑war quirk, the carburettors bolt straight onto the cylinder head—no inlet manifold in sight!
Onto my attempt(s) to unseize the engine.
To tackle the seized engine, I’ve had the pistons soaking in diesel for months. Diesel is basically thin oil and doesn’t evaporate, so in theory it should creep into the rust and ease its grip. The car still has its original starting handle, which should help rotate the engine, but so far it remains as willing as a cat at bathtime. Time for stronger persuasion.
One method is to remove the starter motor to gain access to the flywheel teeth, then apply a suitable lever (read: crowbar) and see if anything is willing to move. So, off came the bonnet—which is how I discovered the hinge issue—and then the radiator, which must have been carved out of solid brass because it weighs a ton . Once those were out of the way, I finally had the space to get at the starter.

This sounded simple enough—three bolts and one hefty cable—but one of those bolts also serves as a brake‑pedal return stop/adjuster, which meant it wasn’t keen to leave its cosy home.
After some fiddling, I freed the bolts and cable… only to find the exhaust downpipe blocking the motors’ escape route. As the entire exhaust will be replaced anyway, I cut the downpipes just below the manifold, and at last the starter motor came out.

That’s when I spotted a new mystery: a 1.5cm hole which can be seen just above the Jaguar logo on the block. According to fellow SS and Mk4 owners, that hole definitely shouldn’t be there. One theory is that someone drilled it to relocate the block’s drainage tap—which Jaguar originally placed in a rather silly spot above the starter. The coolant is not pressurised, so plugging the hole will be easy enough, but I’m keen to find out why it’s there in the first place.
With the starter finally removed, I tried levering the flywheel to see whether the engine would budge—an exciting moment that lasted all of three seconds. Nothing moved. Not even a polite wobble. Which means the next step will be removing the cylinder head to see just how stubborn things really are… but that’s a story for the next update.

On a brighter note, I did enjoy finding a brass plaque on the starter motor. These little touches add real charm to what is otherwise a very utilitarian component. I haven’t tested the motor yet, but it does rotate, so with luck it’ll be perfectly restorable.

Whilst I was “in the neighbourhood,” so to speak, I decided to remove the water pump—after a brief mental challenge of trying to figure out how it was actually attached. My reward for this triumph? Yet another entry for the ever‑expanding List of Mechanical Miseries: the casting is cracked right where the main hose connects. Can these castings be repaired? I’ve no idea. The pump itself is internally corroded, stiff as a Victorian butler, and generally unenthusiastic about turning, so I’ll see if I can coax some rotation back into it before I start begging the world for replacement parts.

On to the next delight. Removing the thermostat housing (which also holds the temperature sensor) revealed that the aluminium casing/water jacket had suffered a break at some point in its life. Judging by the colour of the fracture, it’s an old wound. Perhaps it can be laser welded, assuming the welder doesn’t laugh me out of the workshop.

Speaking of laser welding, the valve cover decided to join the List of Mechanical Miseries by showing me it has a long stress crack running between the bolt holes. Apparently this is quite common and usually caused by someone in the past over tightening the bolts. Modern practice, I’m told, is to laser weld the cracks and polish the repair until it’s invisible—though I imagine one must still take care not to warp the casing and create troublesome oil leaks.

james.gurnett2@gmail.com what a superb description of the pleasures of restoring an antique motor vehicle
No one will be able to restore a Modern expensive heap .
No available electronic parts
after 35 years .zz